For quick and dirty SQL reports, it’s hard to beat dedicated tools such as WinSQL, SQuirrel SQL, or AQT. However, if you find yourself running the same query on a regular basis and then manually importing the results into Microsoft Excel and customizing the look and feel of the results within Excel (alignment, formatting, titles, etc.), you may find it quicker to connect Excel directly to the external data source (database) and letting Excel run your SQL to retrieve the data directly.
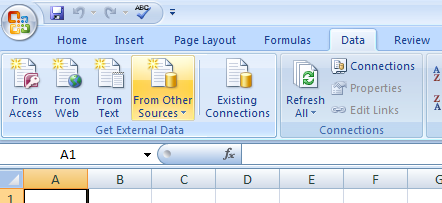
The first thing to do is establish the data source connection. Select the Data tab on the ribbon and click on the From Other Sources command in the Get External Data ribbon group.
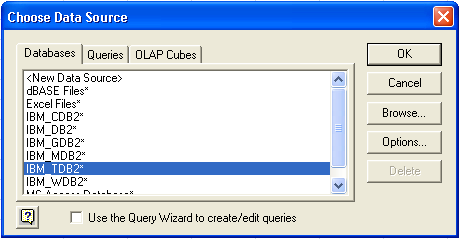
From the pop-up menu, select “From Microsoft Query.” This will bring up the Choose Data Source panel. (Note: I had trouble when the ‘Use the Query Wizard to create/edit queries’ item was checked so I keep it unchecked.)
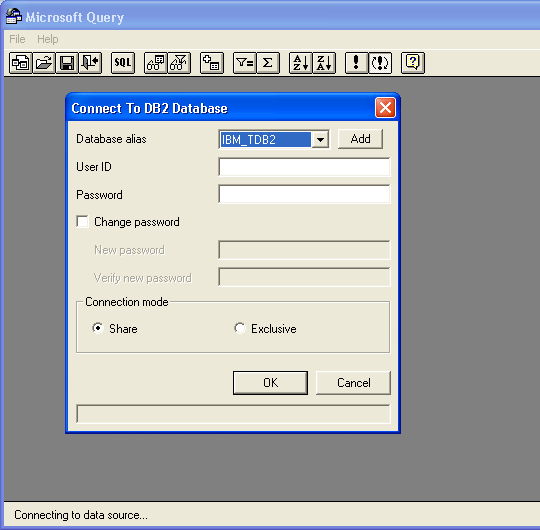
Select the desired connection from the list of available connections. If you don’t see the connection needed, you will have to manually add/configure the data source first. Clicking OK will start the Microsoft Query application and display a connect to database dialog.
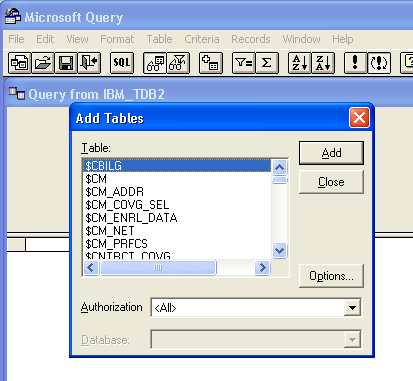
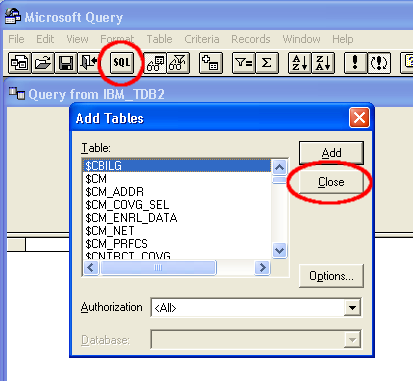
Enter your log-in credentials for the selected database connection and click OK. It may take a while to connect to the data source the first time. Once connected, Microsoft Query assumes you want to create your SQL query using the graphical/visual method (similar to MS Access) and prompts you to select the tables for your query.
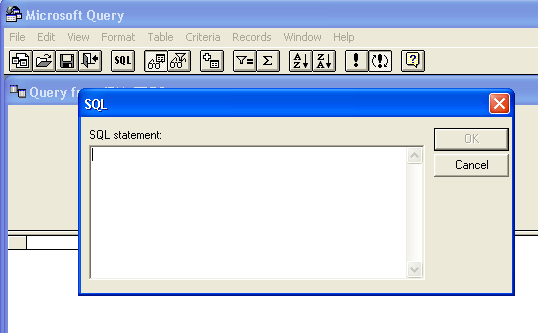
We want to key the SQL directly so close the Add Tables panel and click on the SQL button from the Microsoft Query tool bar to bring up the SQL editor.
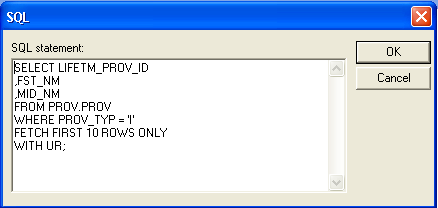
Don’t spend too much time at this point getting your SQL perfect – the SQL can be modified/edited later from within Excel. Just key something close enough to return some data. For example:
Once you have your SQL entered, click OK. Since we didn’t use the graphical SQL editor, Microsoft gives us the following Microsoft Query warning
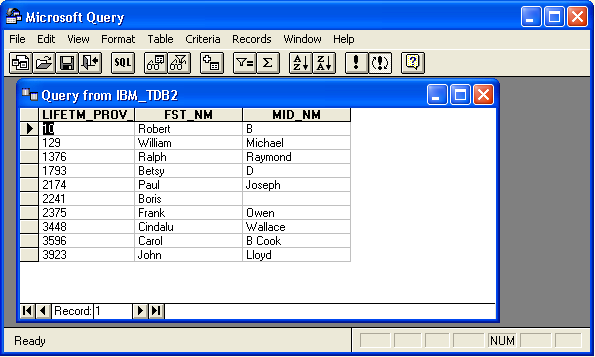
Click OK to continue. Assuming you have no SQL errors, you should see the results of your SQL in Microsoft Query.
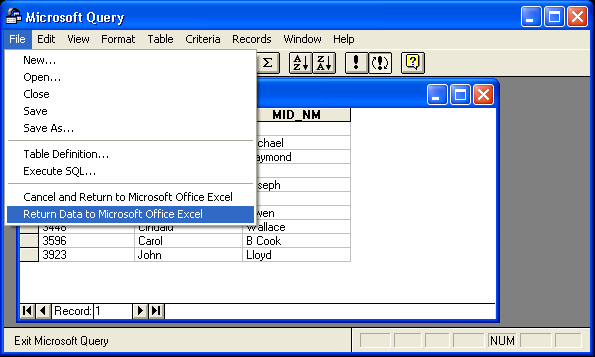
Now we are ready to move the data, SQL, and connection info back to Excel. From the File menu in Microsoft Query, select Return Data to Microsoft Office Excel.
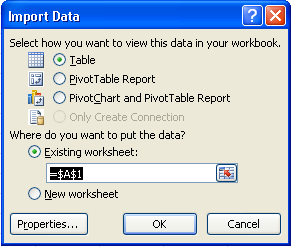
This will close Microsoft Query and take you to an Import Data panel in Excel. Review the options as needed and click OK.
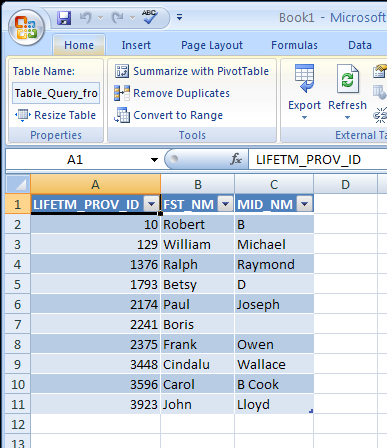
Your results are now displayed in a new table (if that is the import option you selected – the default).
If you save your workbook, the data connection and SQL is saved along with it. When you want to rerun your SQL, select the Refresh command from the Connections ribbon group, or right-click in the Table and select Refresh from the pop-up menu. You may be prompted for your user id and password to execute the SQL.
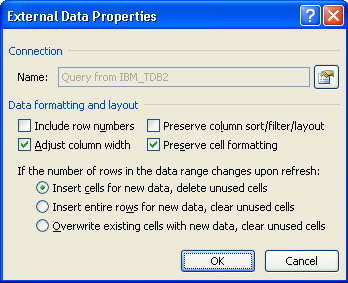
Before you start changing/tweaking your SQL (e.g., adding/removing columns, column aliases, changing the order of the columns, sort, etc.), review the “Data formatting and layout” options on the Properties panel. To view the properties, click on the Properties command button located in the Connections ribbon group on the Data tab.
I recommend turning off the Preserve column sort/filter/layout and Preserve cell formatting options until you have finalized the report. Once you have the SQL and all column formatting the way you want (you can use any of the column formatting options for dates, currency, highlighting, alignment, etc.), you will want to turn on Preserve column sort/filter/layout and Preserve cell formatting. If you have manually sized your columns, and want to keep them that way when you refresh the data, turn off Adjust column width. The best way to learn how these options affect the view is by trial and error.
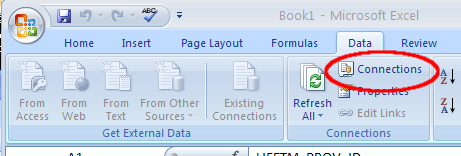
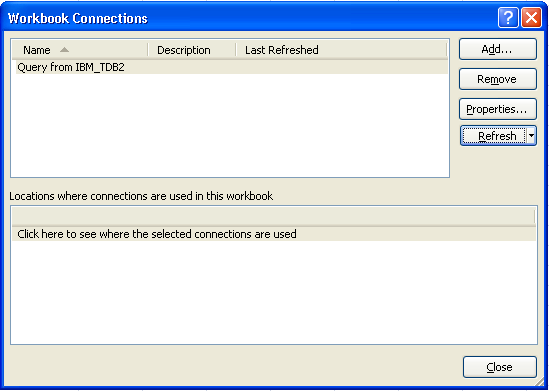
When you are ready to edit/modify the SQL, select the Connections command button in the Connections ribbon group of the Data tab to open the Workbook Connections panel.
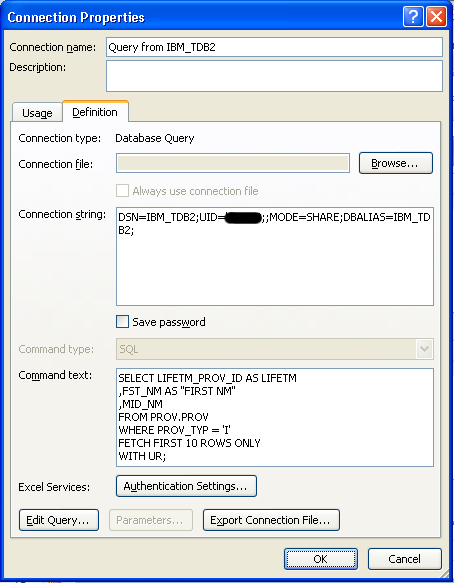
On the Workbook Connections panel, select the connection (a workbook can have more than one connection) then click on Properties. On the Connection Properties panel, select the Definition tab. The SQL is listed in the “Command text:” box.
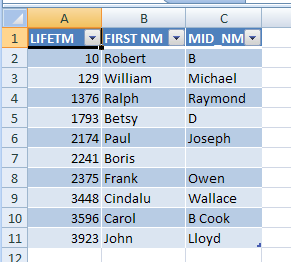
I find it easier to edit the SQL if I maximize Connection Properties panel (click-drag on bottom right corner of panel to expand). In this example I added column aliases to the SQL. If your alias contains a space, you can use the ” (double quotes) around the alias. I’m not sure what the SQL limitations are; I have been able run some pretty complex queries (multiple table joins, sub-selects, where conditions, etc.) without trouble.
When you are done, click OK. You may be prompted to enter your user id and password for the database connection. Follow the refresh instructions above to update the report.
TIP: Once you have a workbook/spreadsheet with a data connection, you could just start with that spreadsheet instead of going through Microsoft Query. That is, pull up the spreadsheet, save it as new workbook and then edit the SQL for the new report. If your new report requires a different data source connection, however, I recommend starting from the beginning.
Have Fun!!
